Creating a New Workspace Session

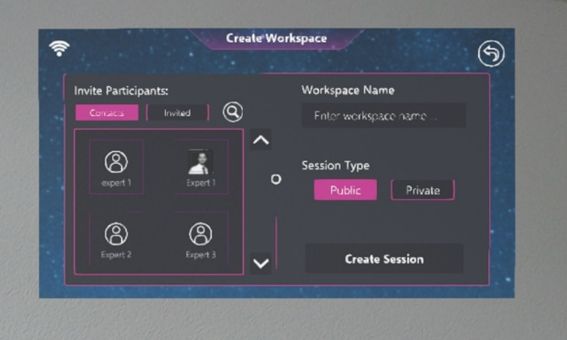
After having selected ‘Create Workspace’, the user is presented with the panel depicted above.
On the top right, a Workspace name needs to be entered. Directly below, the session type has to be declared either private or public.
To the left, contacts can be invited to the private Workspace session by clicking on their profile. With the arrows next to the contacts, the list can be scrolled up and down. With the button depicting a looking glass just above the list of contacts, it can be searched for specific people.
After having made all settings adjustments necessary, the user can click the ‘Create Session’ button on the bottom right in order to start the Workspace session.
After having clicked the ‘Create Session’ button, the user is required to place an anchor point in the space around him by gazing and clicking on a suitable spot, after which the Workspace session is started.
Hint: In case of joining a Workspace session from a different location, the anchor point should be placed on the same elevation level in both locations (e.g. both on the table, or both on the floor) in order to avoid a vertical offset. With the button in the top right corner, the user can close the create workspace panel and return to the workspace panel.