Selecting and Launching Workflows & Workorders
Launching a Workflow
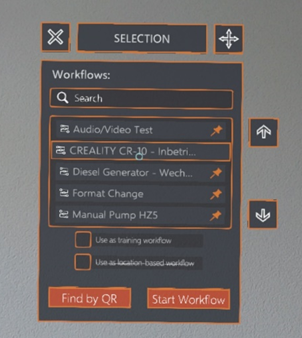
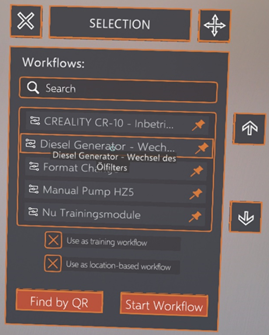
After having launched the TASK panel, the user is presented with the panel pictured above, containing a list of workflows.
By choosing a workflow with a pin-symbol next to its name and enabling the ‘use as location based workflow’ option, the user can start a location-based workflow, i.e. a workflow where the user is guided step-by-step within his physical space, as the panels are located exactly at the positions where the actions need to be performed.
By disabling the ‘Use as location-based workflow’ option, the user can start a tag-along workflow, i.e. a step-by-step instruction where the panel follows the user’s field of view and movement within physical space.
With the ‘Find by QR’ button in the bottom left corner, no workflow has to be selected. The user can simply scan a corresponding QR code, which triggers the workflow to start automatically.
With the button in the top left corner, the user can close the TASK panel.
With the button in the top right corner, the user can move the TASK panel around.
After a selection has been made, the user may click on the ‘Start Workflow’ button in the bottom right corner.
Returning to a Closed Workflow Session
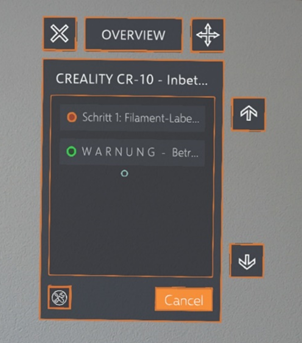
After having closed an active workflow session by means of the button in the top left corner, it can be reopened again through the corresponding button in the session menu.
After reopening the active session, the user is presented with the panel depicted above. From the list in the middle, the user can choose the step to go back to and then continue working on the workflow. With the arrows to the right of the panel the user can scroll up and down the list of active workflow steps.
Should the user wish to close the workflow (WARNING: unsaved data will be lost), he can do so by clicking the ‘Cancel’ button on the bottom right of the panel.
With the button in the top left corner, the user can close the panel.
With the button in the top right corner, the user can move the panel around.
With the button in the bottom left corner, the user can launch the instructor mode:
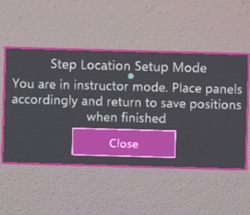
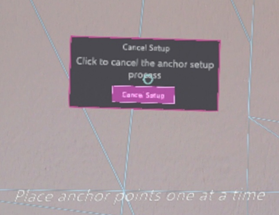
When launching the instructor mode, the user is prompted to define two physical reference points, one after the other. Afterwards, the user is able to define panel & indicator positions for every step of a workflow to be launched in location-based mode, beside adding on-the-fly attachments of all kinds (pictures, videos, audio files). When this has been done for every step of the workflow, the locations are saved:
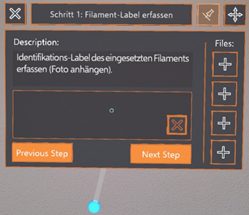
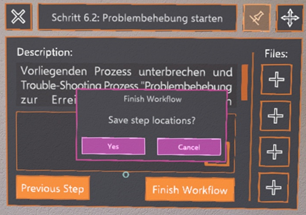
Workflows with saved step locations are marked with a pin symbol in the TASK panel, indicating that the workflow can also be launched in location-based mode by means of activating the option:
