Location-Based Workflows
General
By default, execution of a workflow occurs in tag-along mode where the content generally follows the user around. Alternatively, workflows can be executed in “location-based” mode which spatially references the content in physical space. More specifically it allows:
Step to be shown in the specific locations where the work must be performed
Lead users from through the physical space as they execute
Draw attention to key points of interests in physical space
Attachments to be spawned in the optimal position - informative, but not intrusive
Enabling location-based workflow execution requires a one-time setup procedure to lay out the content in the correct locations. All subsequent executions of the workflow will be according to the layout defined in the setup.
Location-based workflows are only possible using mixed reality devices.
Setup Mode
The setup of a location-based workflow consists of two phases: initial localization and content setup. This can only be done by users who have the right permissions assigned to their role (“can manage workflows”).
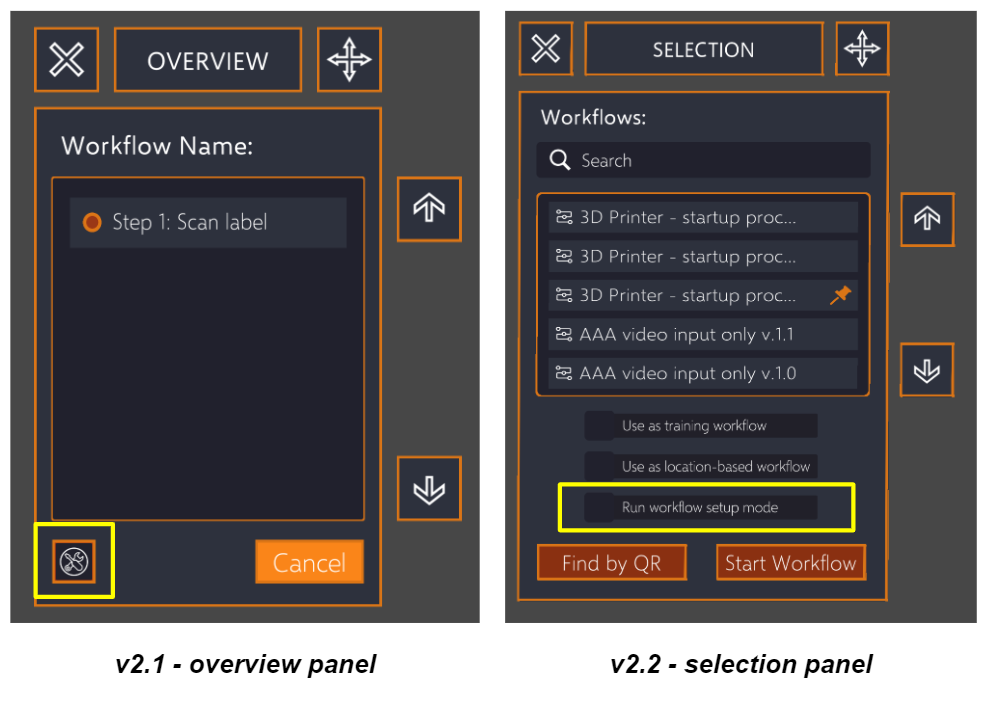
In sphere v2.1 and prior, users must first launch the workflow and can then enter setup mode from the step overview panel.
In sphere v2.2 and later, users will be able to immediately start workflow setup mode from the workflow selection panel.

Initial localization
The workflow localization step involves setting up a coordinate frame of reference for the entire workflow which is done by placing two key points in space. As general guidelines, these key points should be:
Easily accessible for the operator
Placed on a flat static surface that does not move over time
Marked in a way that operators will know to place reference points there
For example, this can involve placing a sticker or piece of tape on the exact location
The setup user will be guided through this localization procedure on device, by means of the system prompts. Afterwards, they will move on to content capture and placement.
For HoloLens 2 users, the setup and execution localization step can be done using only a single QR code, instead of two. If localizing without QR codes, it still requires two points.
Content placement & capture
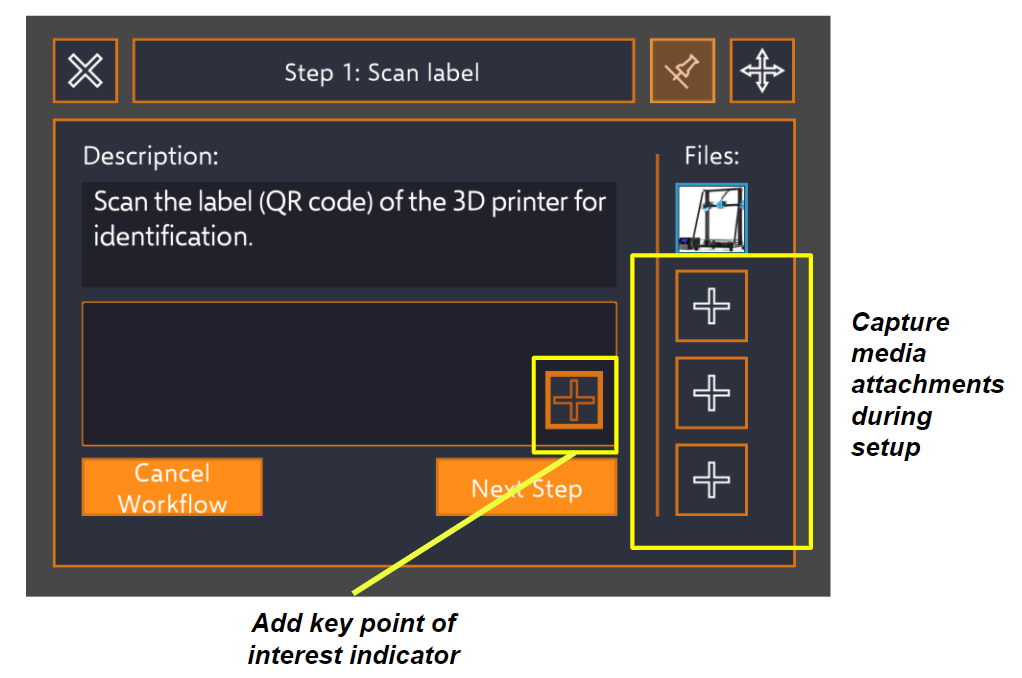
Simply by dragging the content to the desired location, the setup user can define for each workflow step:
Step panel position in space (mandatory)
Attachment locations (optional)
To assign a position, just spawn the hologram and drag it to the desired position
To unassign a position, delete the hologram during the setup procedure setup mode.
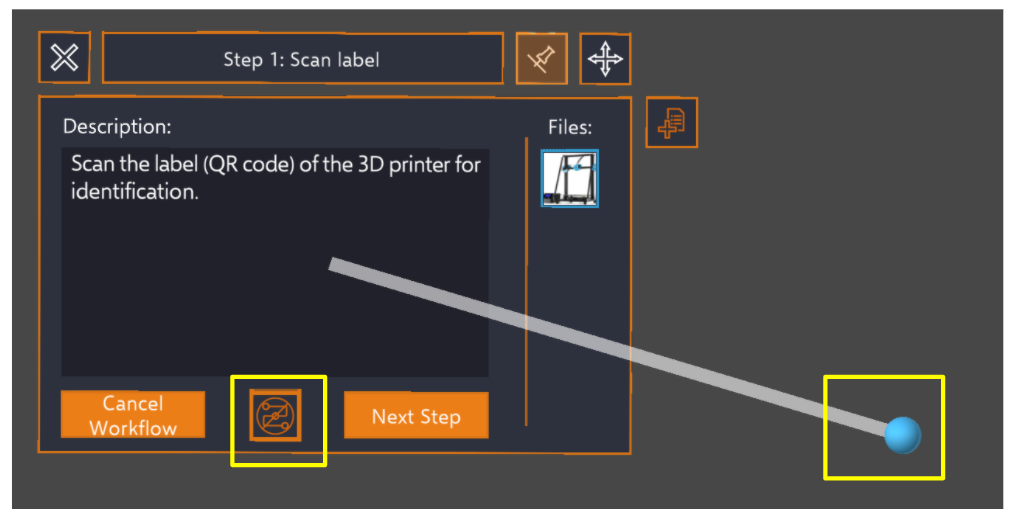
Key point of interest indicator (optional)
If enabled, the setup user can drag the line handle to the point of interest location

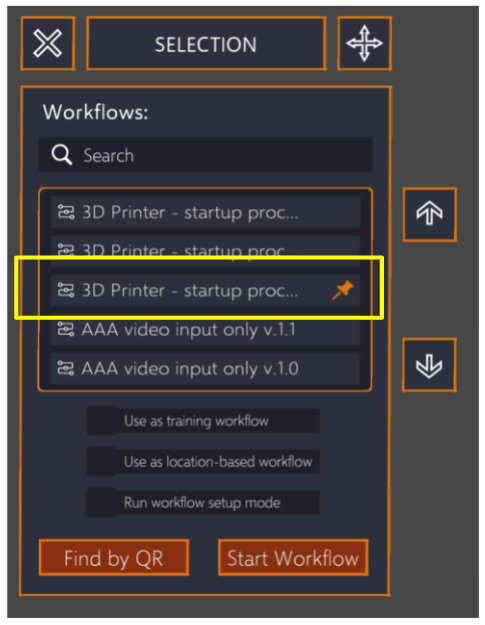
Once finished, the user can then save the location-based data and configuration and the setup is complete. Users should now see the workflow with a pin icon to indicate that it is location-based.

Modifying existing location-based workflows
Altering a workflow that is already set up as location-based is very simple and follows the same procedure. Any location-based configuration or data that already exists will be loaded during the setup phase as well so the process does not start over from scratch.
All steps must have location data in order for the workflow to be executed in location-based mode. If more steps have been added to a location-based workflow, these steps will need to be assigned location data during another setup procedure.
Execution Mode
Workflows that have been setup as location-based workflows are marked with a specified pin icon in the workflow selection panel. Although a workflow may be set up for location-based execution, users will still be given the choice to execute it in tagalong mode if they prefer.

Just like in setup mode, the first step in execution mode is to establish the coordinate frame of reference for the workflow. System prompts will guide the operator to place the key reference points in the locations defined during the setup phase. This is why it is important that these points in the physical space are easily recognizable.
Once this coordinate space is established, the rest takes care of itself.
Step panels will automatically appear in the locations they have been assigned and will animate to the next position when changing steps in order to lead the user to their next physical location. When in location-based execution mode, the workflow step panels are always pinned in space and cannot be unlocked or set to tagalong mode.
The key interest point indicator will be shown by default. If operators find that it is in the way or distracting, they can choose to hide it for themselves using the dedicated hide button on the panel.
Media attachments that have been assigned a particular position in space during the setup phase will be automatically spawned at that location. Otherwise, they will spawn in the default location, directly to the right of the step panel. Once spawned, these attachments can be moved if desired.
