Executing Workflows & Workorders

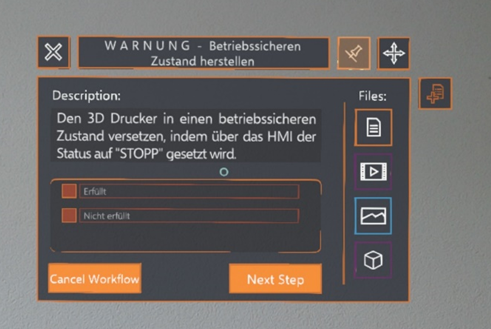
After having started a Workflow, the user is presented with a panel similar to the one depicted above, depending on the workflow settings.
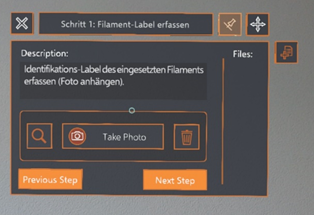
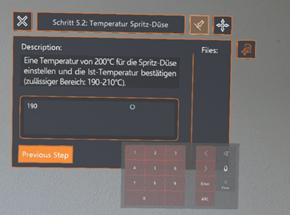
The user can work through workflows in a step-by-step manner while providing the required user inputs for each step – such as checking boxes or providing photo, audio, video, numeric or text inputs. Two examples are depicted below. Provided inputs can be reviewed and changed before submitting the final report.


On the right side of the panel, a list of files attached to the workflow step is included. By clicking on one of the items on the list, the user can launch the corresponding file holographically.
With the button to the right of the panel, the user can make on-the-fly attachments to a workflow step (e.g. text input, photo input, audio input or video input).
With the ‘Next Step’ button, the user can move on to the next step of the workflow. With the “Previous Step” button, the user can go back to the previous step.
With the ‘Cancel Workflow’ button, the user can cancel the workflow. Cancelling an in-progress workflow leads to the loss of all entered data.
With the button in the top left corner, the user can close the workflow panel.
With the button depicting a pin on the top right, the user can pin the panel to a location in reference to the real world or unpin it and have it tag along his field of view.
With the button in the top right corner, the user can move the workflow panel around.

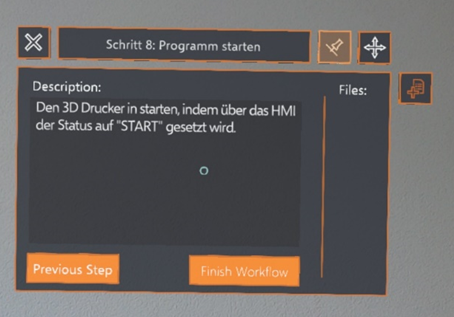
After having reached the last step in a workflow, the user is required to click the ‘Finish Workflow’ button on the bottom of the panel, after which a dialogue box will open asking the user to confirm he wishes to finish the workflow.